|
|||||||||
|
|||||||||
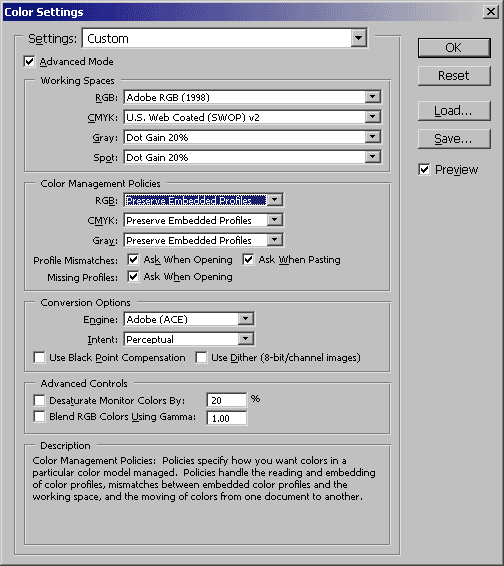
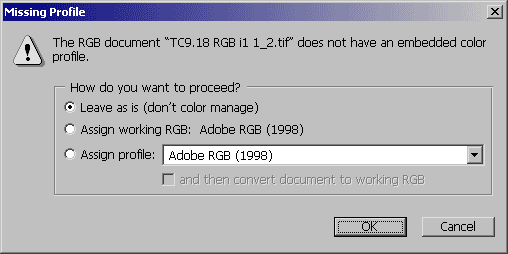
3) Printing The Color TargetsWhen printing color targets, it is important that you do not use any color management at all. The following steps will show you how to setup Photoshop and print without using color management. 3.1) Setup the Proper Color SettingsStart Photoshop and go to the Color Settings dialog by clicking Edit->Color Settings (Mac: Photoshop->Color Settings). You may have to check "Advanced Mode" to get the dialog below. 3.2) Open the TargetsBy now, you should have downloaded the proper targets and un-zipped (or un-stuffed) the files into a folder on your computer. (Please use 8.5 x 11 paper to print the targets) RGB Printers: 2 RGB targets will need to be printed: CMYK Printers: 4 CMYK targets will need to be printed: These targets have no color profile attached to them. It is important that you select "Leave as is (don't color manage)" when opening the targets.
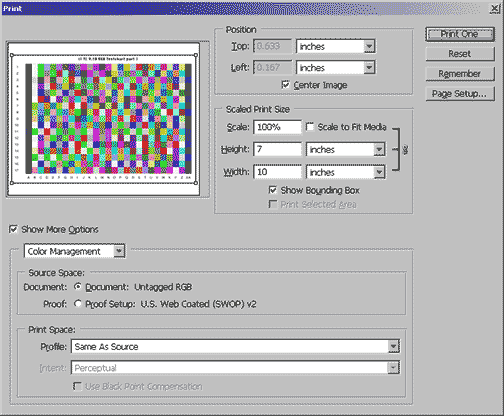
3.3) Print With Preview: Disable Color ManagementNow you're ready to print. From Photoshop's menu, select File->Print with Preview... You may need to check "Show More Options" and select "Color Management" from the combo box. Select the proper printer from the Page Setup menu. Select Landscape and 8.5 x 11 paper. It is important to select "Same As Source" for the Profile your using. Since the document is "Untagged RGB", this essentially eliminates any color management.
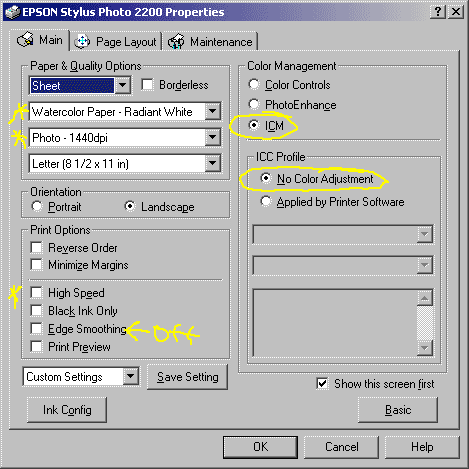
3.4) Print Driver SetupEvery print driver's setup dialog is going to be different. The following is for an Epson 2200 printer. After setting up Photoshop's "Print with Preview", click Print and then click the "Properties..." button to setup the printer driver. You may have to click the "Advanced" button to see the dialog below. Although this is for the Epson 2200, other printers will be similar. Make sure to disable any automatic features (Color Controls, Photo Enhance, etc.) Select ICM (in this case) and "No Color Adjustment". Continue to select your paper type and print resolution. High Speed is not recommended for best quality. Also, turn off any smoothing, sharpening, or enhancement, as you will be doing that in Photoshop.
In this example for the Epson 2200, we've checked the "Show this screen first" checkbox so we don't have to click the "Advanced" button every time.. 3.5) Print the TargetsNow, click OK and print the target. Repeat steps 3.2 through 3.4 above for the additional targets. Note that Photoshop may go back to default print settings when you open a new file. You'll have to repeat the setup in step 3.2 through 3.4 for each target. |